Published
- 6 min read
How I deployed Cloudflare using Terraform

This task has been long overdue for me. I’ve always wanted to front my blog through a CDN along with WAF and DDoS protections enabled.
Why Cloudflare?
For a long time I’ve been contemplating about using AWS CloudFront + WAF, however the AWS service isn’t free if I wanted to use AWS WAF, although it is not that expensive, but for the traffic I have through this blog, it is not worth the investment.
The table below outlines the difference between Cloudflare and AWS and how I’ve came to the conclusion to go with Cloudflare.
| Service | Cloudflare | AWS CloudFront |
|---|---|---|
| Architecture | Reverse Proxy | Traditional CDN |
| Bandwidth | Free (no limit) | Free 1TB of data transfer out | followed by $0.0085 per GB for first 10TB |
| SSL/TLS Certificate | Free | Free with ACM |
| Managed Rules | Free Managed Ruleset | Pro subscription required for more comprehensive protection | Free for AWS Managed Rules |
| Custom Rules | Free (10 rules each) | Included with CloudFront |
| WAF | Free (5 rules) | $5/month (Web ACL) - $1/rule | $0.60 per 1 million requests | |
| DDoS Protection | Free | Free (AWS Shield Standard) |
| Terraform Provider | Yes | Yes |
As you can see, I get essentially everything I need for free by using Cloudflare. I do not require very complex rules and the number of allowed free rules are more than enough for me.
The main reason why Cloudflare can offer such service for free is because the more web traffic they can analyse through these free plans, it makes their service much better for their paying premium members.
Source Code
For those who wants to jump straight to the Terraform IaC which I am using. The code is available in my GitHub Repository.
Overview
At a high level, the following was performed.
-
Setup local environmental variables with the API key (this is for Cloudflare Terraform Provider)
-
Create Cloudflare Zone (done via IaC - will explain below)
-
Migrate DNS zone records from AWS Route53 to Cloudflare DNS
-
Update DNS registrar to point Name Server records to Cloudflare
-
Apply Terraform IaC to configure rules for cache, redirection, WAF etc.
-
Update local host file for testing (public DNS records are not yet fully replicated over the internet)
Deep drive
This section here I will dive deeper into each step that was performed.
Setting up environmental variables
When defining the provider "cloudflare" {} we can pass in the API key as code, however this is generally not a good practice for storing secrets, especially when I am committing my code into a public Git repository.
To setup my local environmental variable, the following commands were executed:
       # Note: My ~/.bashrc sources ~/.bashrc.alex
$ echo 'export CLOUDFLARE_API_KEY="123"' >> ~/.bashrc.alex
$ echo 'export CLOUDFLARE_EMAIL="[email protected]"' >> ~/.bashrc.alex
Creating a Cloudflare Zone
The zone contains my web URL which is “lexdsolutions.com”. Once the zone is created, I can setup the DNS, WAF and other configurations for my site.
The following commands are executed to setup the zone in Cloudflare.
Note: the Terraform backend is saved in an S3 bucket, therefore I must assume role into AWS first).
       # See: https://github.com/88lexd/lexd-solutions/tree/main/misc-scripts/python-aws-assume-role)
$ assume-role --c cred.yml -r roles.yml
$ export AWS_PROFILE=lexd-admin

$ terraform init
$ terraform apply -target cloudflare_zone.lexdsolutions
Migrating DNS Zone from Route53 to Cloudflare DNS
DNS is required to be hosted by Cloudflare for this to work. Previously I have my DNS zone hosted in AWS Route53, so therefore the records must first be migrated to over Cloudflare DNS.
As I didn’t have that many records to recreate, I just recreated them manually.
The root level domain I am using requires the A record to be “proxied” via Cloudflare. This is how the record looks like on Cloudflare.

Finally, once the domain and DNS records are setup, I’ve logged into my domain registrar and updated the Name Server record to point to the Cloudflare name servers. Note: This will take up to 24 hours for the changes to be fully replicated over the entire internet. I’ll be covering how I tested my configuration in the section below.
Apply Terraform IaC
The remaining configurations such as cache, rules and other settings are applied as IaC. The following commands were executed:
       # See: https://github.com/88lexd/lexd-solutions/tree/main/misc-scripts/python-aws-assume-role)
$ assume-role --c cred.yml -r roles.yml
$ export AWS_PROFILE=lexd-admin

$ terraform apply
Test Cloudflare configuration
Now that all the configurations are applied and DNS is now hosted by Cloudflare, I will need to test the configuration. Due to the delay of up to 24 hours for DNS to full replicate over the internet, the local host file on my machine is updated to force traffic on my machine to route via Cloudflare to verify the settings.
First I need to determine how Cloudflare will route traffic to my website, to do this, we use “nslookup”.
       $ nslookup
> server bob.ns.cloudflare.com  <------- Set to query Cloudflare
Default server: bob.ns.cloudflare.com
Address: 173.245.59.104#53
Default server: bob.ns.cloudflare.com
Address: 172.64.33.104#53
Default server: bob.ns.cloudflare.com
Address: 108.162.193.104#53
Default server: bob.ns.cloudflare.com
Address: 2606:4700:58::adf5:3b68#53
Default server: bob.ns.cloudflare.com
Address: 2803:f800:50::6ca2:c168#53
Default server: bob.ns.cloudflare.com
Address: 2a06:98c1:50::ac40:2168#53
> lexdsolutions.com  <------- query my record
Server:         bob.ns.cloudflare.com
Address:        173.245.59.104#53

Name:   lexdsolutions.com
Address: 104.21.51.90  <------- Take note of this record (can be any from this response)
Name:   lexdsolutions.com
Address: 172.67.177.252
Name:   lexdsolutions.com
Address: 2606:4700:3034::ac43:b1fc
Name:   lexdsolutions.com
Address: 2606:4700:3037::6815:335a
Now that we have the target IP address and since I’m using Windows as my main driver, the following file was modified:
- C:\Windows\System32\drivers\etc\hosts
2 lines are added into the host file, and these are:
       104.21.51.90 lexdsolutions.com
104.21.51.90 www.lexdsolutions.com
Save the file and run a quick ping command to ensure the OS is now pointing my domain to the IP address configured as above:
       $ ping lexdsolutions.com
PING lexdsolutions.com (104.21.51.90) 56(84) bytes of data.
64 bytes from lexdsolutions.com (104.21.51.90): icmp_seq=1 ttl=44 time=137 ms
64 bytes from lexdsolutions.com (104.21.51.90): icmp_seq=2 ttl=44 time=141 ms
64 bytes from lexdsolutions.com (104.21.51.90): icmp_seq=3 ttl=44 time=139 ms
^C
--- lexdsolutions.com ping statistics ---
3 packets transmitted, 3 received, 0% packet loss, time 2003ms
rtt min/avg/max/mdev = 136.964/138.929/140.581/1.493 ms
Since I’ve created a test WAF rule, I can simply hit that URI path and force a challenge on myself. For example:
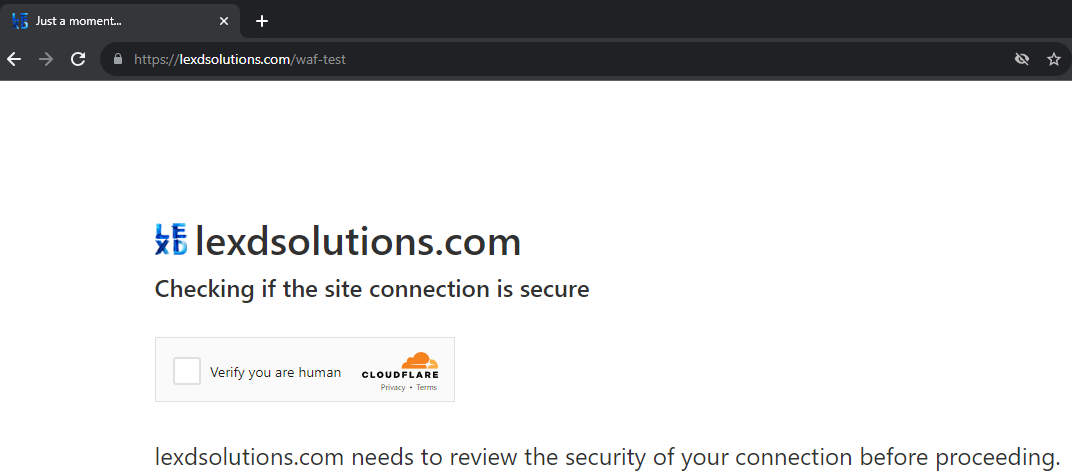
Oh and look at that! I can see Cloudflare has successfully forced a challenge on me!
Conclusion
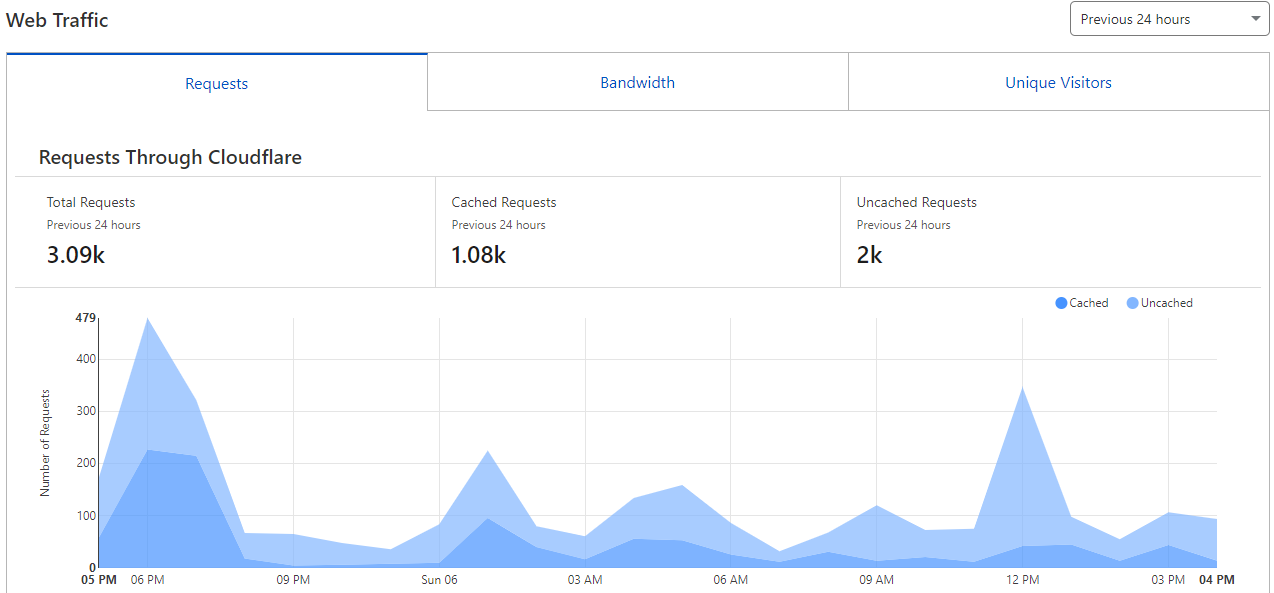
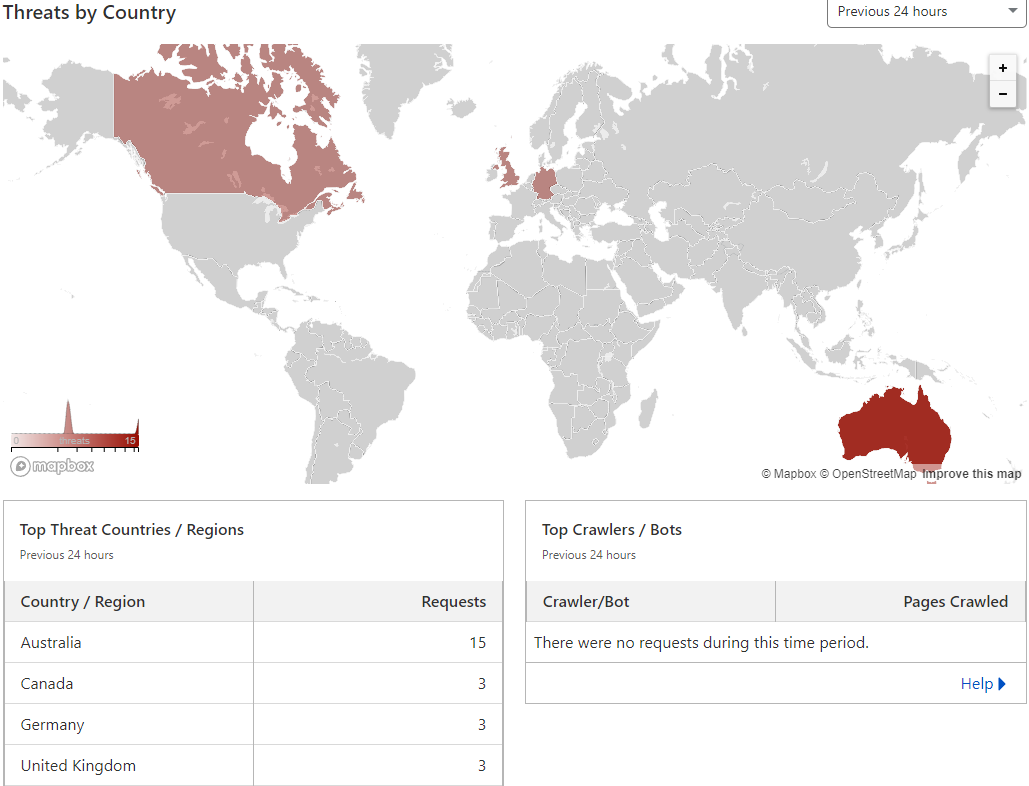
I am really happy that I finally get to do this and although it hasn’t been a full 24 hours yet and I can already see traffic getting routed through Cloudflare to my website. The dashboard is great even for the basic/free version!
Here are some examples:
Web Traffic
Security
I hope you find this useful or interesting! Feel free to leave a comment below! :)